Serving sailors online since 1997
Hunter OEM Parts
General Marine Parts
Keel Bolt Repairs
posted 01-12-2016 by heritage
Click for larger view
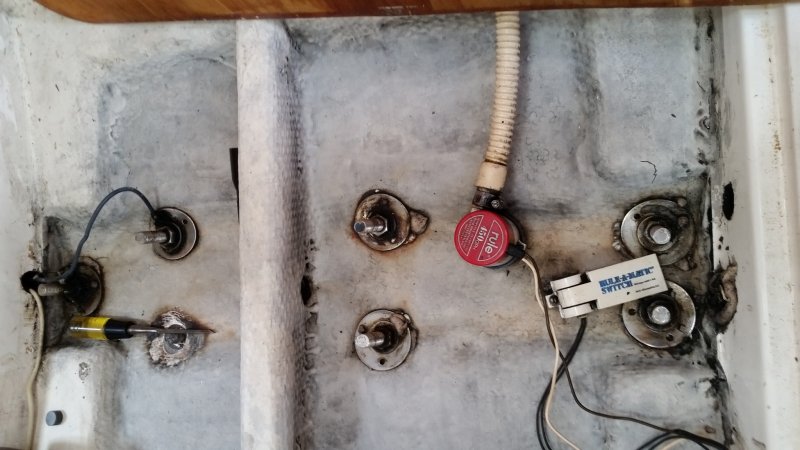
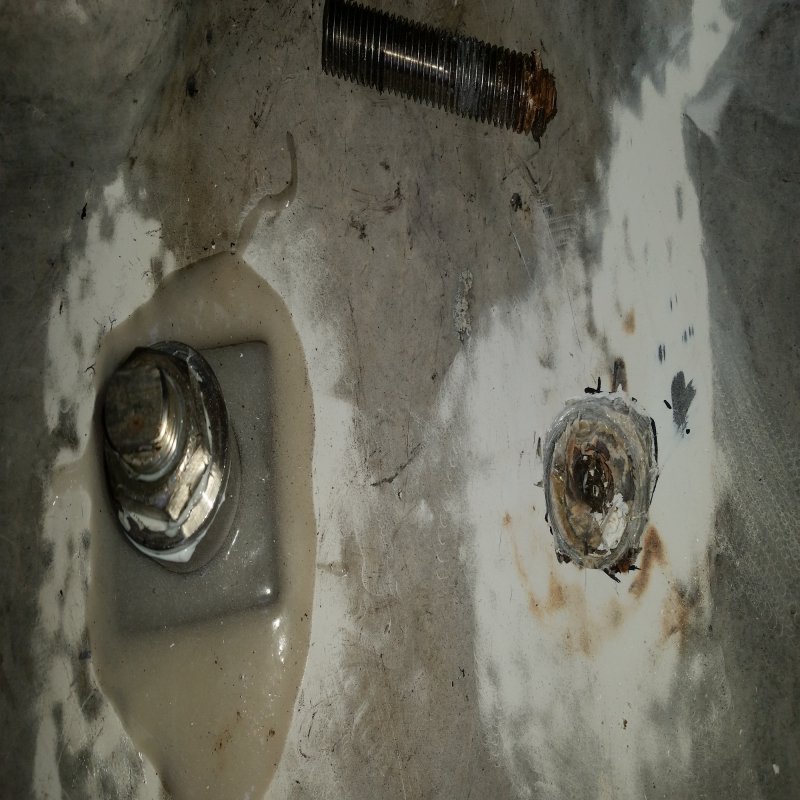
I noticed lots of rust spots around the bolts and washers. I put a wrench on one bolt and it literally broke in half. You can see the stub of the bolt near the chisel. The good news is that there was no water coming up around the bolts. After more inspection, I found two more bolts that wiggled a bit. Taking all of the nuts off, one at a time as the boat is in the water, I found corrosion on three other bolts under the area where the nuts were. Classic case of crevice corrosion caused by years of being submerged in salt water from a dripping engine packing gland. What to do about it ?
Click for larger view
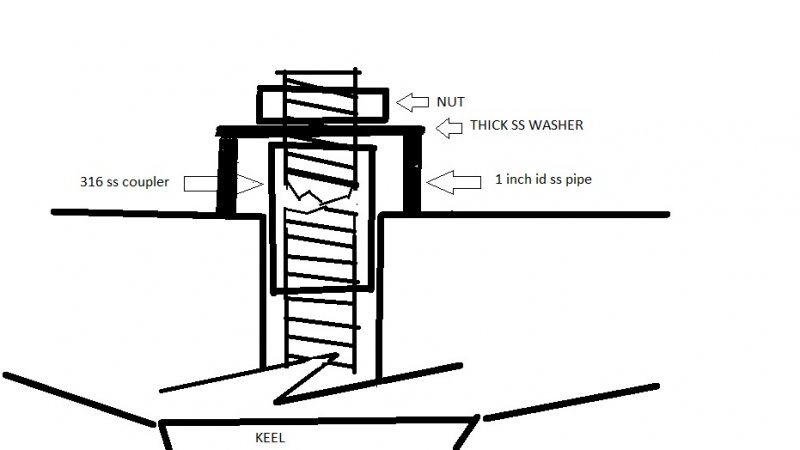
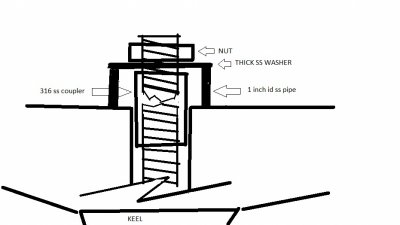
I decided on this approach. Use a ss coupler to connect the broken bolt stub with the remaining bolt piece. Then surround the coupler with a inch section of schedule 80 ss pipe 1 id. Mount a thick ss washer on top of the pipe and then the new ss nut. The pic does not show the large square washer that fits under the section of pipe.

Click for larger view
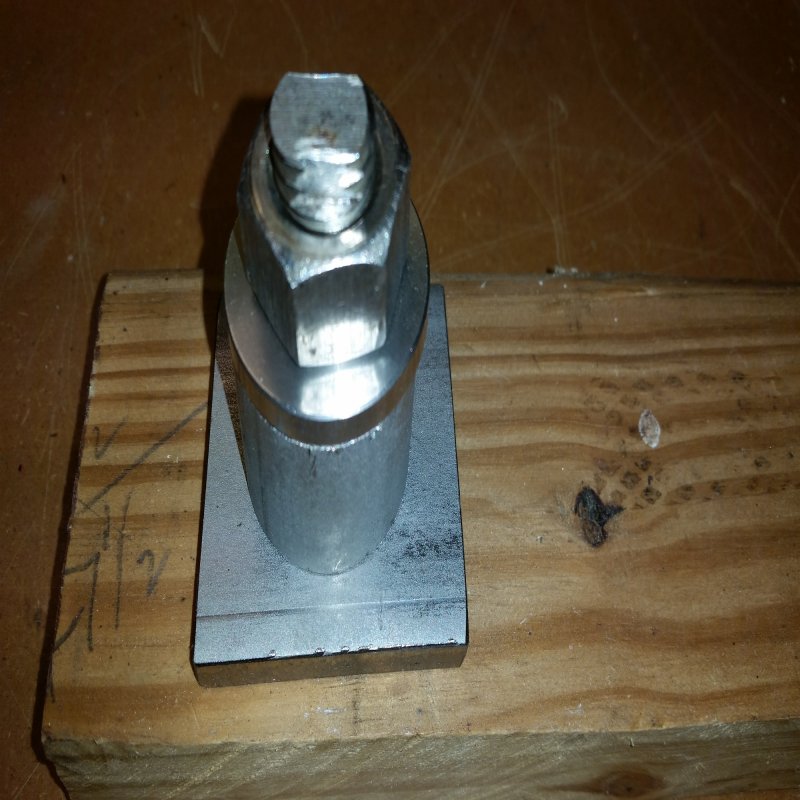
Here are the parts. The coupler is inside the pipe.

Click for larger view

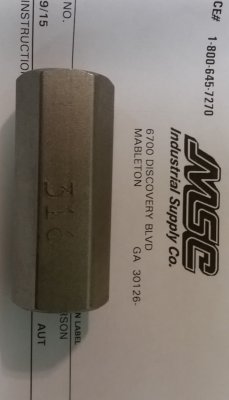
The coupler is 316 ss and a little over 2 inches long.

Click for larger view
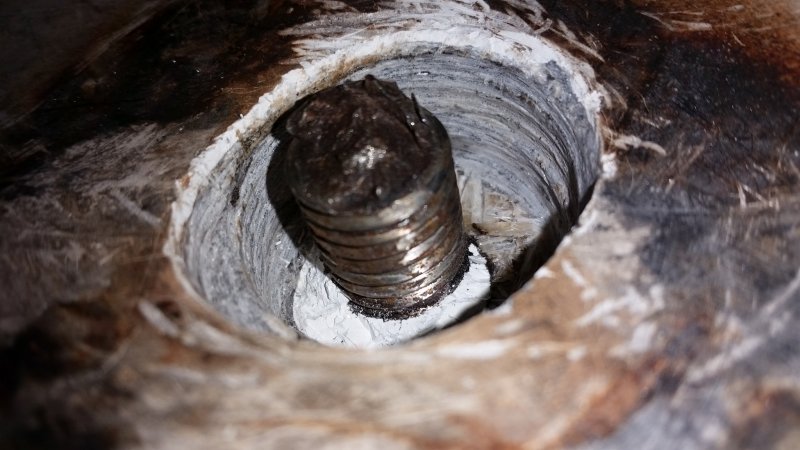
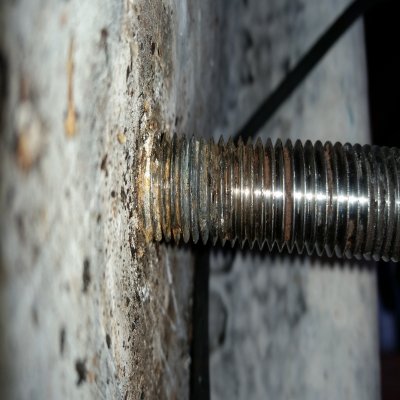
You need to go down into the keel stub a little over one inch to give the coupler enough bite on the bolt. I used a hole saw and chisel to make the cavity. The Hunter keel is solid glass laminate and they used a white resin to fill the space between the bolt and the larger access hole. The resin is what kept the salt water from migrating down the bolt.
Click for larger view
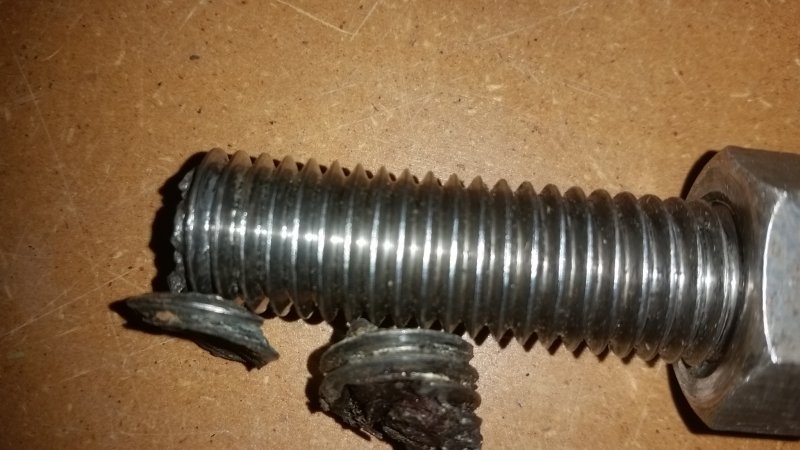
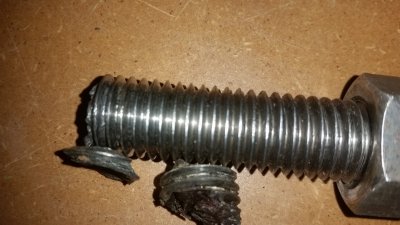
Here is one of the broken bolts and two pieces of the bolt that were located under the nut. On closer inspection, several of the nuts had cracks caused by the corrosion.
Click for larger view

Coupler from MSC.

Click for larger view
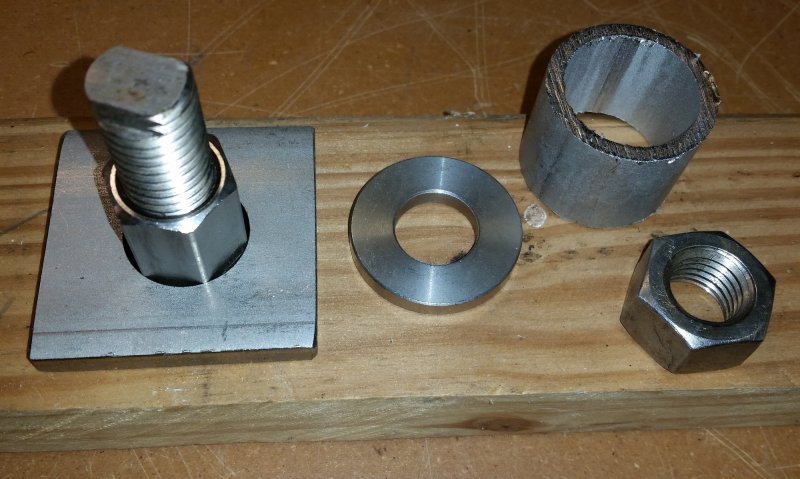
Square washer fits over hole cut around bolt in keel stub. Coupler goes through the square washer and screwed down to the bottom of the keel cutout. Other half of bolt screwed into coupler. Pipe section goes around coupler and on top of square washer. Round washer goes on top of pipe section and finally the nut.
After screwing the coupler down on the stub, poured fairly thick epoxy putty in around the coupler until it flowed out onto the bilge floor. Then layed the square washer on the epoxy. Put more epoxy on top the washer and laid the pipe section on that. Should be water tight up to the top of the pipe section.
After screwing the coupler down on the stub, poured fairly thick epoxy putty in around the coupler until it flowed out onto the bilge floor. Then layed the square washer on the epoxy. Put more epoxy on top the washer and laid the pipe section on that. Should be water tight up to the top of the pipe section.

Click for larger view
Here is a finished assembly and one in progress. I used TefGel on the coupler bolt assembly.
Click for larger view

This shows a bolt that has some corrosion but is still solid. I decided to go ahead and give it the full coupler treatment. Because the bolt was too tall to use a hole saw to clean out the glass for the coupler, I drilled several holes around the bolt and cleaned it out with a 1/4 inch chisel.
Click for larger view
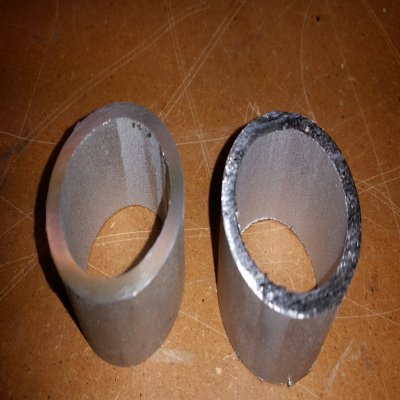
Here are the one inch id pipe sections. The company, OnlineMetals, will cut the pieces in any length for a dollar a cut. The cut was a little rough so I smoothed them out with a file and sand paper.
Resizeing of the pics caused distortion in the shapes of of pipe.
Resizeing of the pics caused distortion in the shapes of of pipe.
Click for larger view
Another pipe section pic.
If you do find corrosion on your keel bolts, there are other options such as sistering threaded lag bolts into the lead keel or totally encapsulating the keel with glass cloth onto the hull. But if there is no evidence of corrosion below the level of the bilge floor, I think that the coupler approach is a relatively inexpensive and sound solution.
If you do find corrosion on your keel bolts, there are other options such as sistering threaded lag bolts into the lead keel or totally encapsulating the keel with glass cloth onto the hull. But if there is no evidence of corrosion below the level of the bilge floor, I think that the coupler approach is a relatively inexpensive and sound solution.