Serving sailors online since 1997
Hunter OEM Parts
General Marine Parts
A Different 37.5 Windlass Installation
posted 05-28-2022 by Mika1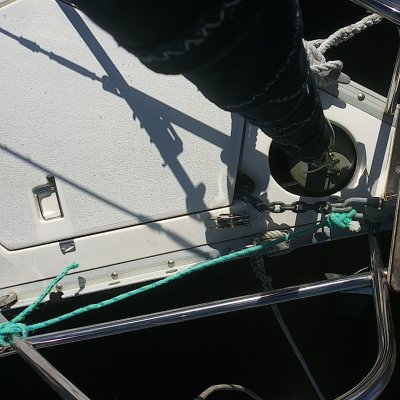
Click for larger view
Let me start by saying Im no expert. My only experience with fiberglass was making subwoofer enclosures for a couple vehicles Ive owned in the past. Ive never worked with gelcoat before, and while Im not an engineer I feel like Ive got a pretty good grasp of basic structural concepts such as torque and shear that were relevant to this project. What Im saying is I feel like if I can do it, you can too - given similar skills, a measure of patience, and attention to detail. That being said, lets get into it.
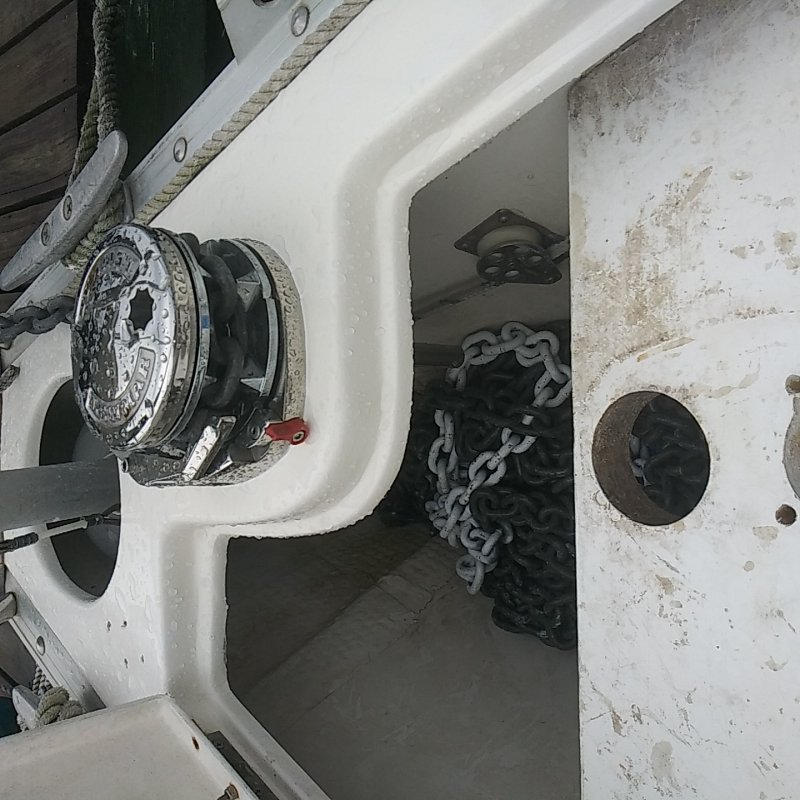
When I bought this boat, the windlass was mounted to a board in the anchor locker. There were several problems with that, including poor angles of pull in both the horizontal and vertical axises (axies? ), chain drop of only about 8 inches, and questionable strength of the board-to-boat connection. Ive looked at a lot of other windlass installations, both on this website and on boats on the market and didnt like certain things about them so I started rubbing my surviving brain cells together and this is what I came up with. The deepest part of the chain locker on the 37.5 is forward, so it makes sense that its best to have the chainfall as forward as possible. That also avoids penetrating the cored deck, drilling into the interior space of the boat, and the chain interfering with opening or closing the anchor locker lid. The downside of my solution is that the motor is in the wet environment of the chain locker but the benefits of a 14-16 inch chainfall, clear foredeck, no risk of interior leaks or a soggy deck core, and ease of access outweigh that in my opinion. Not pictured is the correction of the angle of the bow roller. Originally it was aligned in a straight line with the starboard cleat and toe rail. I marked it up with a sharpie and took it to a welding shop where they realigned it so it now feeds straight to the windlass. Also not documented are the deck switches and cockpit control switch, but mounting and wiring them is pretty standard.
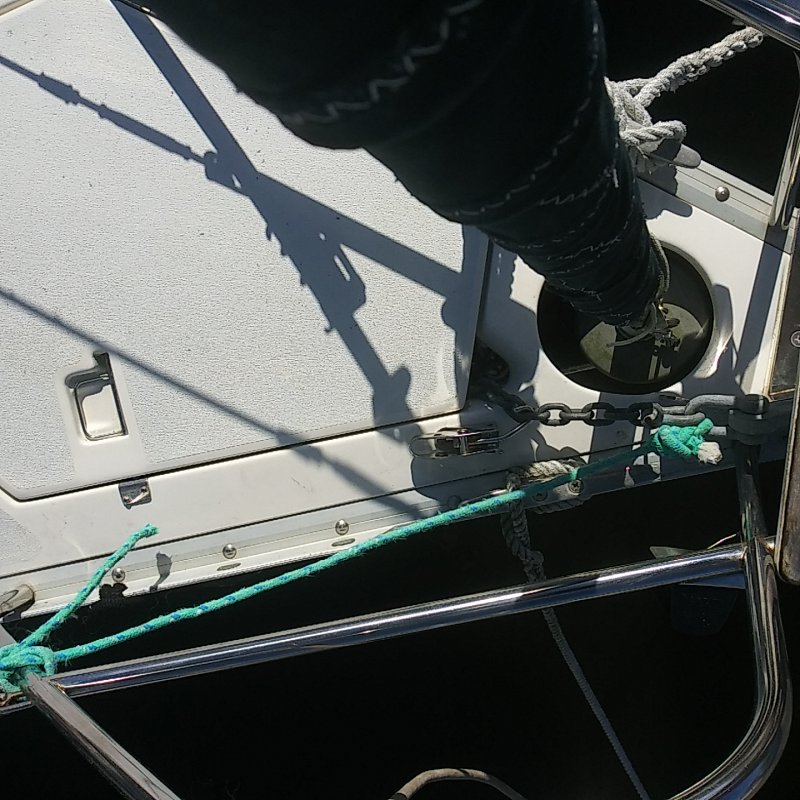
This is the before pic, in case youre not familiar with the foredeck of a 37.5. Note the forward edge of the chain locker lid.
When I bought this boat, the windlass was mounted to a board in the anchor locker. There were several problems with that, including poor angles of pull in both the horizontal and vertical axises (axies? ), chain drop of only about 8 inches, and questionable strength of the board-to-boat connection. Ive looked at a lot of other windlass installations, both on this website and on boats on the market and didnt like certain things about them so I started rubbing my surviving brain cells together and this is what I came up with. The deepest part of the chain locker on the 37.5 is forward, so it makes sense that its best to have the chainfall as forward as possible. That also avoids penetrating the cored deck, drilling into the interior space of the boat, and the chain interfering with opening or closing the anchor locker lid. The downside of my solution is that the motor is in the wet environment of the chain locker but the benefits of a 14-16 inch chainfall, clear foredeck, no risk of interior leaks or a soggy deck core, and ease of access outweigh that in my opinion. Not pictured is the correction of the angle of the bow roller. Originally it was aligned in a straight line with the starboard cleat and toe rail. I marked it up with a sharpie and took it to a welding shop where they realigned it so it now feeds straight to the windlass. Also not documented are the deck switches and cockpit control switch, but mounting and wiring them is pretty standard.
This is the before pic, in case youre not familiar with the foredeck of a 37.5. Note the forward edge of the chain locker lid.
Click for larger view

I started by sanding the back side of the lip of the deck, and the underside, to raw glass. This isnt intended to be a how to fiberglass writeup so Ill be leaving a lot of details out but this was a lousy part of the project because it all had to be done by hand, reaching under and checking my progress with a mirror. I also sanded back the existing gelcoat from the lip and the top surface of the deck. Because I was planning to finish with gelcoat I used polyester resin from a local fiberglass shop. Epoxy has better adhesion but either one requires a clean raw surface to bond to. I then cleaned everything with acetone and covered a piece of 1/4 plywood with plastic, waxed it, and held it up from the bottom by wiring it to a crossbar through the bow pulpit. This gave me a surface for the first two layers of 1708 fiberglass cloth. I thickened some resin with cabosil and created a filet to ease the transition from the horizontal surface to the vertical surface of the lip and laid the cloth, rolling it out with a fin roller. This was the first tie-in to the existing deck.
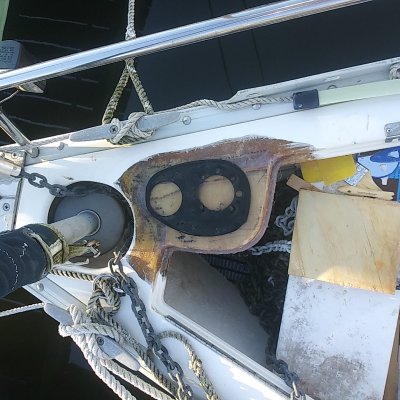
The Lewmar V1 windlass needs a 1-2 inch thick mounting surface so I used two pieces of 3/4 marine plywood for coring material. The second tie-in to existing deck is tabbing between the two layers of coring, and the third tie-in to existing is two layers of tabbing applied to the underside of my new structure, up the back side of the lip and underside of the deck. The fourth and final tie-in to existing is the top layers of glass being tied in to the surface of the deck. Thickened resin was used to bed both layers of coring and to create the lip the lid will sit on when its finished. That 3/8X3/8 contour was covered in glass along with the edge of the coring. Thats about the point at which this pic was taken with the gasket for the windlass set on top for reference and orientation.
The Lewmar V1 windlass needs a 1-2 inch thick mounting surface so I used two pieces of 3/4 marine plywood for coring material. The second tie-in to existing deck is tabbing between the two layers of coring, and the third tie-in to existing is two layers of tabbing applied to the underside of my new structure, up the back side of the lip and underside of the deck. The fourth and final tie-in to existing is the top layers of glass being tied in to the surface of the deck. Thickened resin was used to bed both layers of coring and to create the lip the lid will sit on when its finished. That 3/8X3/8 contour was covered in glass along with the edge of the coring. Thats about the point at which this pic was taken with the gasket for the windlass set on top for reference and orientation.
Click for larger view
This picture shows the result after much sanding and experimenting with gelcoat color matching. To protect the coring from any water intrusion, I also glassed the holes under the windlass for the chain fall and the motor/gearbox. The holes for the mounting bolts were overdrilled, filled with thickened resin and then drilled to fit. Is it perfect? No, but its not bad for an amateur.
Click for larger view

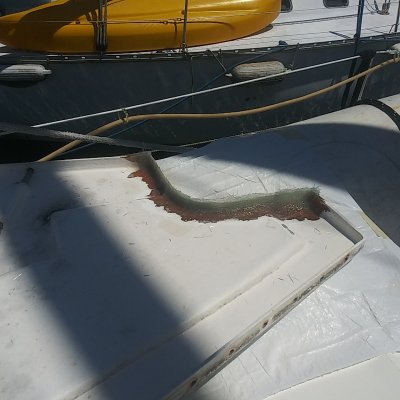
With the mounting pad for the windlass done it was time to start on the lid. Cutting with a jigsaw exposed that the lid has some wood coring which I ground back and filled with thickened resin to start. Then I cut a strip from a plastic garage sale sign and duct taped it to the lid to provide a backing for the filet of thickened resin and the first layer of glass. When that set up I removed the plastic and laid glass from the front side till it matched the thickness of the rest of the lip.

Click for larger view
After a little more glassing and a whole lot of sanding, this too got a gelcoat finish. All the gelcoat I did was applied with a brush, sanded flat, then sanded smooth with 1500 and 2000 grit then compounded by hand. Note that I also scraped, shaved and sanded the nonskid back to create a smooth reveal around the new contour which matches the original look from Hunter.

Click for larger view

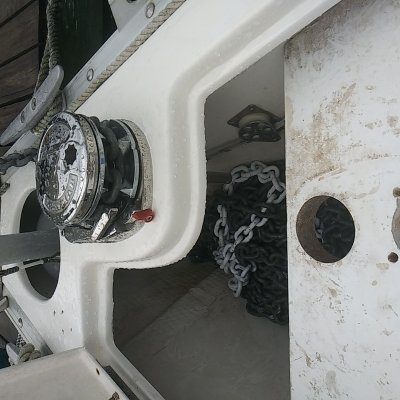
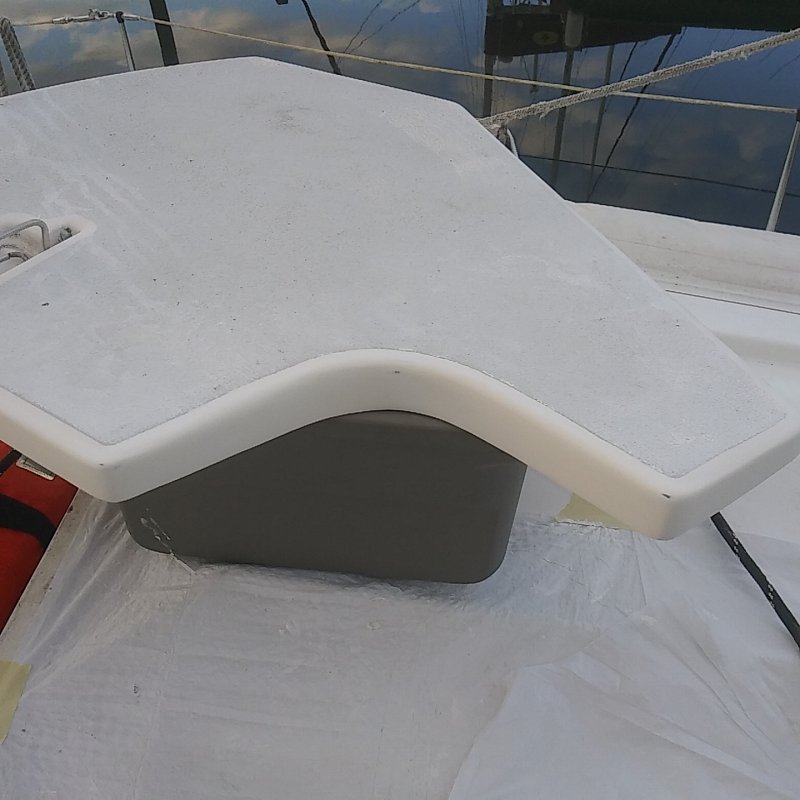
The final product - an awfully big project when you consider its only about one square foot. Im pretty happy with how it came out in both form and function. The chain pile can sometimes interfere with the furling line but thats rare and Ill be moving the furler above deck anyway if I can ever get this Hood to wear out. When that time comes Ill still be able to easily reach the forestay mounting pin because I didnt just seal off the whole front of the chain locker.
Click for larger view

This last pic is the plug I cut out for the motor/gearbox which shows the layup at the center of the new mounting surface. The total thickness of the fiberglass shown here matches the thickness of this area of the factory deck, it just has a wood core. Not represented here are the layers of tabbing from the underside, and between the plywood layers which all provide structural contour and tie in to the original deck fiberglass. The new mount is rock solid and exhibits zero flex. Im quite happy with it.