Serving sailors online since 1997
Hunter OEM Parts
General Marine Parts
Port Water Tank Crack Repair
posted 12-02-2017 by SabreToothedEngineer
Click for larger view
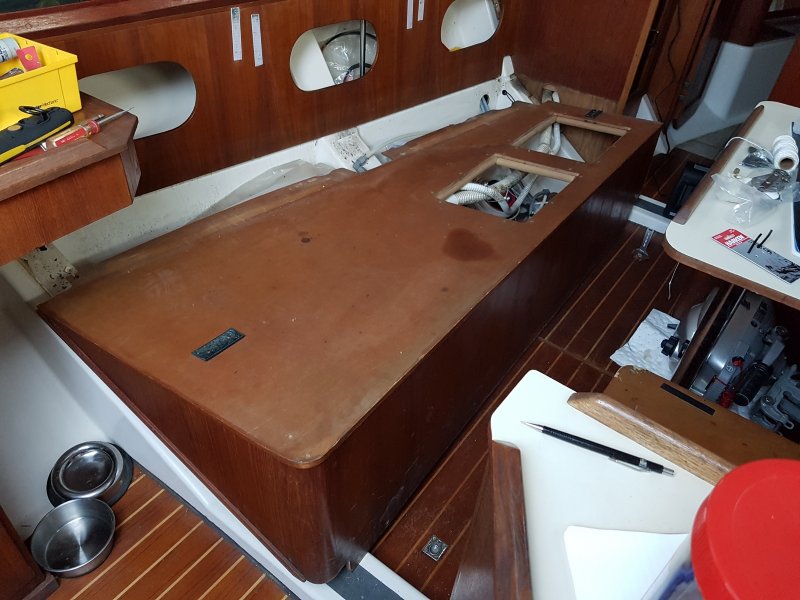
When I filled the port tank under the settee, water would leak out from underneath across into the bilge. This would only happen for a few minutes and then stop, so it was clear that something was leaking near the top. Unlike later builds, the settee in my 83 H34 was installed in a single piece, and it was not effortless to remove it. You can see there is only one screw visible from the top, right in the corner. Everywhere else screws are upwards through cleats or angle brackets. Aft of the front of the water tank you cant possible reach those screws. In this photo its finally loose and has been pulled back about 6 inches.

Click for larger view
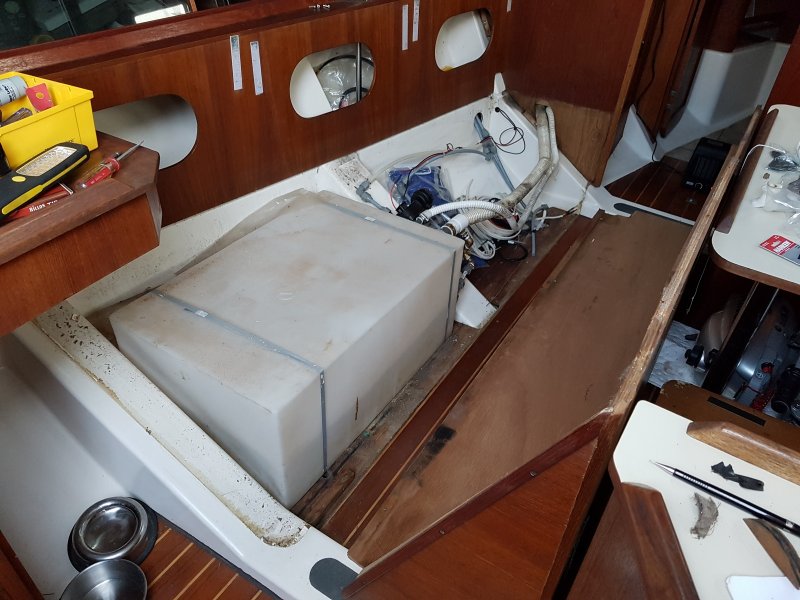
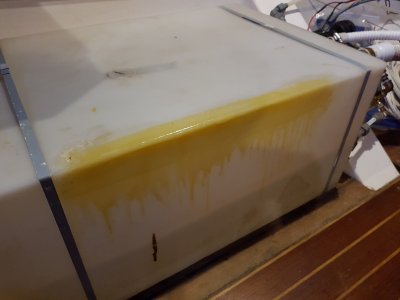
With the settee removed and tipped on its side you can see the half-full water tank. The polyethylene tank wall is only about 5/16 thick, and the crack runs horizontally for 16 inches front to back, between 1/2 and 1 inch down from the top. This is the point of maximum bending stress when that unsupported wall deflects.
Click for larger view
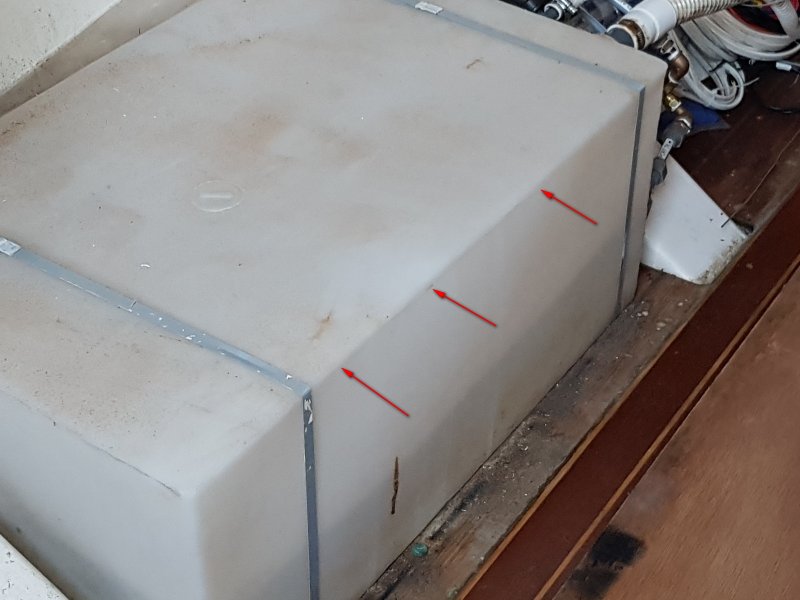
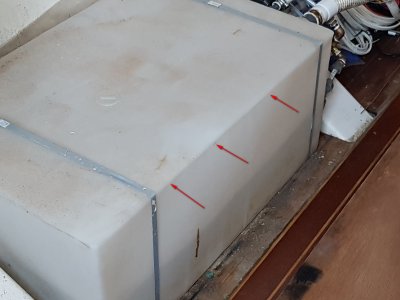
The crack is difficult to see. The arrows show the beginning and end, and the one in the middle shows a slightly discolored bit where I think the actual leakage was occurring.
I used a Dremel rotary tool to gouge out the crack to make a V-groove over the full length, being careful not to break through to the inside.
I used a Dremel rotary tool to gouge out the crack to make a V-groove over the full length, being careful not to break through to the inside.
Click for larger view

I used G-Flex epoxy (CAD$50 for ~200 mL) to first fill the groove, then cover it with a layer of 2 inch fiberglass tape wetted through. This first layer wrapped over the top about 3/4 in. This epoxy sets up VERY slowly, so I was there for a couple of hours using a spatula to keep putting the epoxy back where it belonged.
Surface preparation is crucial to this, as virtually nothing sticks to polyethylene, not even this stuff, unless you get this part right. The first step is pretty obvious - sand it. The second step maybe a little less so - clean it thoroughly with rubbing alcohol. The third part I would have died of old age before I guessed what it was - flame treating. You take a propane torch, and gently wash it over the surface to be bonded. No more than two seconds in any one place. You are NOT trying to melt it. You are trying to oxidize it to chemically alter it so that the epoxy has a fighting chance to bond to it.
I added a second layer of fiberglass tape, this time with the top edge flush with the top of the tank. Another couple of hours of herding epoxy back to where it should be before it finally gelled. And pulling the fiberglass tape back up again after it slipped down.
Click for larger view

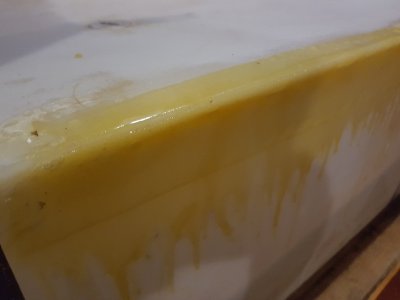
A close-up of the layup. You can see the two layers of tape, one draped over the top, the second with the edge flush with the top. Not perfect, as you can see a few bubbles in there, but really strong. Before I started I could deflect this side easily with my hand. Not now. Its really solid. I cant noticeably move it at all.
Proof of the importance of the surface preparation: where the epoxy dripped down onto the untreated surface, you can pick it off with your fingernails. Up near the top where it was pre-treated I couldnt pick a corner off with a sharp wood chisel.
Proof of the importance of the surface preparation: where the epoxy dripped down onto the untreated surface, you can pick it off with your fingernails. Up near the top where it was pre-treated I couldnt pick a corner off with a sharp wood chisel.

Click for larger view
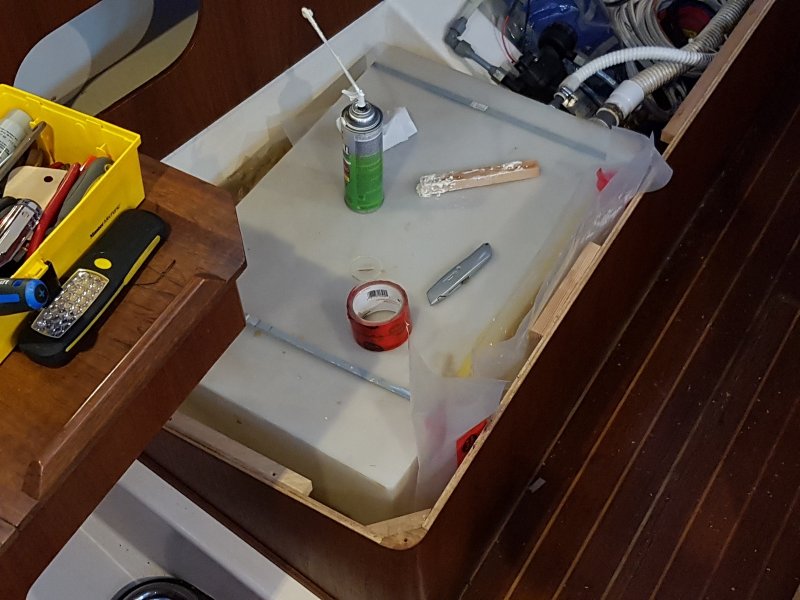
With the bottom part of the settee back in place (yes, the top is now removable from above, like all the boats built later) I made a bag out of polyethylene vapor barrier and Tuck tape and stuck it down between the tank and the settee wall. I filled that with expanding foam insulation. Once set, that foam provides a nice support across the whole tank side to reduce or eliminate flexing.
Click for larger view

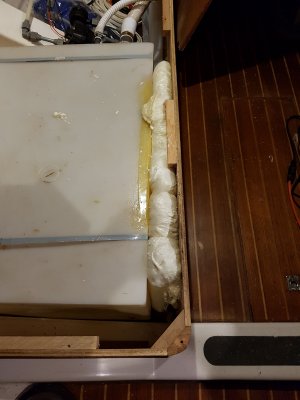
Filled with foam. This stuff is surprisingly firm once it sets.
Im confident that no matter how long this boat stays on the right side of the waters surface, no-one is ever going to have that tank fail in that place again.
Im confident that no matter how long this boat stays on the right side of the waters surface, no-one is ever going to have that tank fail in that place again.